As an Amazon Associate, I earn from qualifying purchases.
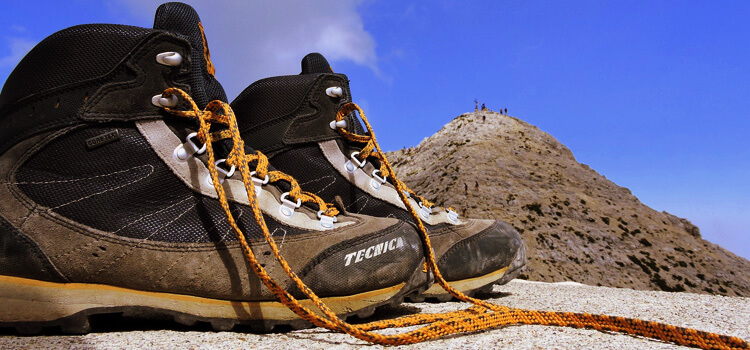
Properly lacing hiking boots should occur from the bottom to the top while ensuring they are tightly secured. The cords usually criss-cross and should be moderately tightened for safety and comfort. When planning to begin your hiking escapade, you need to have prepared your gears with closely laced boots being one of them. Lacing from the boot bottom enables the user’s foot to remain stable while offering the needed support.
This technique will reduce the occurrences of blisters and offer the user protection around the foot ankle and improve foot comfort at large in rugged terrain. Over the years, I have mastered the skill and found it to be a fulfilling experience. Arguably, this method helps in ensuring even pressure while climbing up the boot, thus avoiding cases of feet sliding into a shoe.
Importance Of How to Lace Up Hiking Boots
It seems like strapping into your hiking boots just requires a simple knot. However, failing to use the right technique can have a negative impact on your feet. Your comfort and safety while on the trail depends on doing the lacing correctly.

Distributing Pressure Evenly
The best part is tying the laces correctly ensures the pressure is well distributed on your feet. As a result, no part of your shoe separates and pinches.
- Better lace tension control
- Fewer chances of lace bite
- Better support for your feet
Think about when you go on a hike and all your friends share the luggage load to avoid one getting to tired at the end of the trip. As a result, the feet can only go for long distances.
Preventing Blisters And Hot Spots
When you have one portion carrying more baggage, the feet quickly get tired. Proper lacing is essential in preventing several blisters and hotspots . Shoelaces go in opposite diagonal formation, crossing your foot.
| Bad Lacing | Good Lacing |
| Too tight or loose | Just right tension |
| Moves a lot inside | Stays in place |
| Creates hot spots | Keeps feet cool |
Smart lacing means happier feet. It helps you enjoy hikes without worrying about your feet.
Different Lacing Techniques
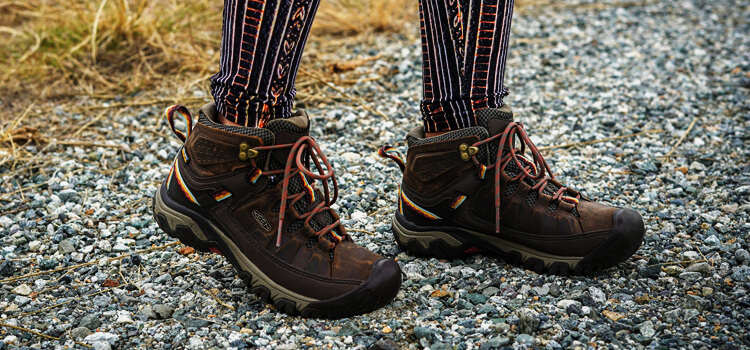
Ready for a hike? But, before you go outside, let’s do the lacing . Your hiking boots are your partners in crime on rough terrain. However, the lacing pattern can make you feel better due to comfort and greater foot support.
Basic Criss-cross Pattern
The criss-cross is a classic and simple pattern of lacing up your boots:
- First of all, put the laces across the bottom eyes.
- Afterward, cross them and insert them to the upper eyes above the first cross.
- Repeat the pattern until clear the way to the top.
It helps to divest the pressure from one place and scatter it evenly.
Lock Lacing
If you need extra ankle support, you may use lock lacing, or loop lacing, which will fix your heels. The following are steps to achieve a look lacing:
- Lace to just below the second-to-last of the boot eyelets, with criss-cross formation.
- Using each of the lace’s end, thread through the top boot eyelet on the same side, creating a loop with it.
- Cross the ends with two closest opposite loop ends from the same side and pull and tie them.
The advantage of lock lacing is that it helps to fix the heel, thereby significantly reducing blisters. Similarly, ladder lacing is a technique used for boots with heavy usage.
Ladder Lacing
For boots that are going to receive heavy-duty use, boots that manufacturers have developed the lace-locking system in, you can use ladder lacing. That entails: Ladder lacing is the ideal solution for women’s outdoor boots which I mentioned above I would teach you.
- To clarifying, run the laces straight across the bottom from bottom to top and up the inside of each eyelet.
- Cross the laces, then feed one under the vertical section from the other side.
- Repeat the process until you get to the final pair of eyelets.
It will ensure a snug fit and reduce movement inside the hiking boots lace.
Backwards Lacing
If you have high arches or pressure points, consider lacing backward:
- Begin with a criss-cross at the toe.
- Then, when you get to the area of concern, lace the same-side eyelet’s top instead of the other way around.
- Continue to the top with criss-cross lacing.
This takes less pressure off the areas where you require more of it.
Select the Perfect Lacing Technique
Ensuring an optimal fit for your hiking boots is essential for a pleasant expedition. Yet, besides selecting the perfect combination of boots, there is something even more critical – indifference, mastering the skill of lacing. Overarching and crisscrossing methods can perfect your trip. Let us help you find the ideal among them to keep your feet as comfortable as possible during each walk. Don’t forget: a lacing style can significantly change the way you feel during the long walks along the paths!
Foot shape and size
Each foot is one of a kind, and recognizing yours’ shape and size is vital to properly hiking boots lace.
- Wide feet? A looser lacing allows your feet more space.
- The feet are narrow? A tighter lacing prevents your feet from moving.
- High arches? Additional foot support is critical and achieved with different lacing patterns.
Intended Hiking Terrain
The terrain dictates the lacing style. Stability and comfort must align with the trail’s demands.
| Terrain Type | Lacing Technique |
| Uneven, rocky paths | Tight at the ankles for support |
| Smooth trails | Even tension for comfort |
| Steep inclines | Secure at the top to prevent heel slip |
Personal Preferences
Lacing boots is based on personal comfort. While some hikers like their shoes tight, others prefer them loose. Test out various lacing systems before heading out to see what makes you comfortable. Your comfort will indicate what method is best for you.
Tools For Lacing Up
When preparing for a hike, your feet must be in good condition. Hiking boots need to be laced correctly to be comfortable . You will need specific lacing tools. This post will outline these tools to ensure a secure and comfy fit.
Proper Sized Hiking Boots
Most importantly ensure your boots fit. Your boots should sit tight on your feet but not too tight. There should also be ample toe movement. Consider the following on size;
- Length: There has to be a thumb width from your big toe.
- Width: Your foot should not slide left-right.
- Heel: No lifting as you walk
Boot Lacing
Your boot laces are essential. Quality lacing assures a quality hike. Here is what to consider on good boot laces.
- Durable: Strong materials ensure they do not snap.
- Length: Long enough to lace up without excess.
- Flexibility: They should tie knots well.
Frayed or old laces need replacing immediately.
Tongue Pads
The tongue of the boot can sometimes shift. Tongue pads can prevent this from happening. Reasons why tongue pads may be necessary include:
- Comfort: It provides cushioning
- Fit: It reduces slippage for a perfect fit
- Safety: It keeps the tongue in place to reduce the likelihood of blisters
They are deemed as optional, but your boots could always use an additional throw of comfort.
Step-by-step Lacing Instructions
Proper lacing of the hiking boots can change everything about your time on the trails. It secures the foot, reduces pressure points and ensures to perfection that your feet do not develop blisters. The following is a walk through the process to ensure that your feet are taken care of next time you decide to hike.
Remove Old Laces
It will be the starting step to work with a clean basis. Do it carefully by pulling old laces out from the eyelets. Dispose of old laces. Remove any dirt that could have moved between the eyelets.
Insert New Laces
Have new, similar laces that fit perfectly. Lace it from the bottom of the boots at. Try to keep similar length.
Tie A Starting Knot
With your easiest style, Crisscross the ends of long lace then gets a knot. 2-3 inches starting from the bottom of the boot.
Begin Lacing The Boots
- Work your way up from the knot.
- Cross the laces alternatively over each other.
- Pass each lace under an eyelet diagonally across.
- Pull the laces to ensure they are tight enough without choking the boot.
Keep going until you reach the top to ensure an upright and firm posture.
Tie A Finishing Knot
Loop it from both ends once you make it to the top. Ensure it is firm but not spectacular or extremely tight, you have to carry the weight around.
Tips For A Comfortable Fit
Although the happiest trail starts with a pair of comfortable boots, ensuring the fit is paramount to walking conditions. The first factor to consider is the lacing up. Apparently, lacing boots correctly can ensure your foot feels snug in the boot without unwanted pressure points. Before fitting, stake on your feet, push the back of your heel into the boot’s heel cup. That can help set the foot and ensure it is not too tight or too lose.
How to Lace Up Hiking Boots?
Lacing up while standing really does help you to put the laces at the correct tension for how your feet will actually be placed when you stand. First, Stand up. Second, Place your boots around your foot. Third, Gently tap your heel back into the heel cup in the boot – that aligns your foot properly inside the boot.
Adjust Tension For Different Areas Of The Foot
Use the right amount of tension in each place on the foot. It is fine to be a little loose towards the toe and then gradually get tighter as you get to the body of the boot. The laces should be tight over the arch of the foot but still give a little bit. The most supported location is near your ankle. This eases the swelling process.
Test Lacing On Short Hikes First
Once you are ready for longer treks, make sure to try your lacing technique on short hikes first. Short hikes are a good test run for your boots in case hot spots or discomfort may appear; you will have learned that you need to tweak your lacing.
Make Adjustments As Needed
Try lacing and often make adjustments for your laces to feel most comfortable on feet. Adjust the laces against your feet; if there is pressure or pain, then you should quickly adjust laces, either loosening them or tightening them.
Common Mistakes To Avoid
Moreover, the feet may slightly swell and contract when you are trekking, so make sure to adjust whenever your feet feel like they need to. Comfort should guide your adjustments. Other than that, when you plan to adventure, consider these common mistakes while lacing up the hiking boots properly.
Lacing Too Tightly
Avoid cutting off circulation by lacing boots too tight. This can cause numbness and blisters. To ensure proper tightness,
- Start loose at the toe
- Tighten gradually toward the top
- Leave wiggle room for toes
Give your feet the space they need to swell a bit on long hikes.
Not Distributing Pressure Evenly
Even pressure distribution along the foot is key. Uneven lacing can lead to:
- Hot spots
- Pain points
- Uneven wear in your boots
- Cross laces uniformly
- Adjust at each eyelet
- Check for tight spots
Not Testing The Lacing Before Long Hikes
Before hitting a trail, test your lacing on shorter walks. This helps to:
- Identify issues early
- Adjust for comfort
- Prevent pain during long hikes
Take time to find what works best for your feet.
Conclusion
Good boot lacing is potentially a game changer in any outdoor adventure, and this is a fact. Short, neat lacing processes provide comfort while restricting injury. Always keep in mind that you are constantly one tie away from a comfortable hike. Follow the lacing tips shared in this article, and your feet will appreciate you for every mile you will cover. Have a satisfied voyage on your boots!
Related Articles:
- How are Hiking Boots Supposed to Fit
- 10 Best Hiking Boot Laces
- 10 Best Hiking Backpacks for Tall Guys
FAQs
Use the heel lock technique where you criss-cross the sides while looping twice in-between to prevent slipping. Make sure adjustments are along the foot for both comfort and an unmovable, tight fit. Continue the cross-lace up hiking boots to the top and tie them securely. Press the sides to make sure there is the same pressure providing enough support.
Start by putting the laces on the bottom eyelets and thread through each pair of eyelets crisscrossing. Check that they are laying flat and no twisting. Have firm upwards and tighter pressure while lacing running up the shoes. Finally, tie a spare boot knot at the top.
Prevent heel blisters by lacing secure at the base, applying a heel-lock or surgeon’s knot before the ankle, and tie so that laces lock in place around the ankle without cutting off circulation. The pressure should distribute evenly from the toe across the instep to the top of the ankle. Adjust tightness and snugness to your instep and through your ankle for comfort and support.
Crisscross from the bottom to the top hooks, tie or tuck the laces. Ensure the pressure around the ankle is secure enough for ankle support yet flexible. Adjust as needed for comfort on the trails.
As an Amazon Associate, I earn from qualifying purchases.
Leave a Reply