As an Amazon Associate, I earn from qualifying purchases.

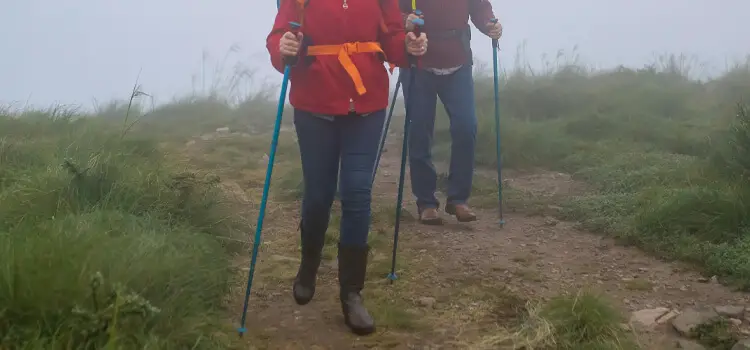
Height can be adjusted to your preference, simply unlock the pole’s grip at the height indicator; move the pole to your preferred length along the measurement marks; and lock the pole securely. How to adjust trekking pole height? Make sure the pole is long enough to glint your hand in a 90 degree position to your elbow on the grip. Hiking sticks or trekking poles are probably the most underrated companions of hikers and outdoor enthusiasts alike for extending additional support and stability with varying topography. Positioning them at the right height directly affects the comfort and utility of the Drop bars. A properly lengthened trekking pole reduces joint impact and helps with stability.
Practice opening and closing your trekking poles’ locking mechanisms before you drag them into the wild since the type of locking system can also differ from model to model some use a twist lock, some use a lever lock, and some use a push-button lock. Keep in mind that the proper height will have your forearms parallel to the ground with your elbows bent 90 degrees when you are holding the poles. The difference between adjusted and not adjusted trekking poles is astonishing but also benefits you as a hiker to hold a better posture and that you do not get too much strain or damage when you are hiking.
Choosing The Right Trekking Poles
It is important to get Best Trekking Poles for our outdoor journey. Some of the most important pieces of gear that give you that stability and support on any terrain you encounter. Experienced trekker or novice, proper poles could make a world of difference.
How To Choose Trekking Poles
Consider these primary factors before buying trekking poles:
- Material: Durable and lightweight equals faster handling;
- Choice of Length: Adjustable poles are perfect for people of varying heights as well as different terrains;
- Locking Mechanism: Stay locks are provided to prevent the poles from collapsing under load;
- Grips: This hiking staff with a padded wrist strap, compact grip and the slip joint at the top to keep the sections together;
- Shock Absorption: Curtain poles may come with a system that absorbs shock to ease the load on your joints;
- Weight: Lighter poles mean less fatigue in the long run;
- Pricing: match the budget with the features you need;
Key Features of Trekking Poles
A trekking pole benefits list could be very long as there are so many different things you need from equipment of this kind. This makes walking poles necessary for any outdoors man, as they are engineered to give further stability and assist during diverse expeditions. A very useful feature of trekking poles is their extendability, where you can adjust the length to suit your comfort and the ground you are walking on.
Understanding Trekking Pole Height Adjustment Mechanisms
Properly setting up your trekking poles is the key to being comfortable while on the trail. Poles: If you are using poles, one pole shorter than shoulder height on the flat will provide the most stability and offload your knees on descents. You have to know how to adjust the height of your poles to get the best use of them.
Types Of Adjustment Mechanisms
There are three basic types of height adjustment on trekking poles:
- Twist Lock;
- Lever Lock;
- Push Button;
How Each Mechanism Works
The way each one works is different. Therefore you always have the correct height while hiking with your trekking poles.
Twist Lock
Twist locks work by locking when twist pole part. To adjust, you:
- The pole is in both hands;
- Then twist the the opposite direction;
- Collapses and extends to your required length;
- Turn again, to make sure it is locked;
Lever Lock
These locks use a lever to hold the sections together. To adjust, you:
- Flip the lever open;
- Extend pole to the proper length;
- Lock the lever back in place;
Push Button
Quick adjustments with push buttons. To adjust, you:
- Press the button on the pole;
- Other sections sliding height;
- Release the button to lock;
Determining The Correct Height For Your Trekking Poles
You need a good pair of 3 section trekking poles for extra stability and support going up and down the undulating ground. But you have to get them right in order to benefit. Getting a height that is best for those trekking poles, all of which.
General Guidelines For Height Adjustment
Proper height adjustment is pivotal to getting the most comfort and performance out of your poles. Lower your elbow to a 90-degree angle. The end of the trekking pole should be near your hand. When on your side more weight is distributed off your arms and it becomes a good resting position.
- This is important because you should stand up straight with your shoulders relaxed;
- Bend your elbow to 90 angle;
- The tread should be in your hand when your arm is bent;
Testing The Height
While this covers the basic setup for your trekking poles, the last thing you should always do after adjusting your poles is testing. Walk with Poles on Flat Surface Notice how your body feels. Be sure your shoulders are back and down and your arms are just relaxed by your side, swinging naturally.
- Walk with the poles to perceive the size;
- Hold your arm naturally (unstrained arm swinging);
So listen to your body and adjust, should you experience any discomfort. Shorten the poles a bit when going uphill. Extend them for those descents to keep your feet on the ground. Remember to always secure the adjustments when you finish your hike.
- Shorten poles for uphill trending trails;
- Extend out for downhill;
Adjusting Trekking Pole Height
Changing the length of your trekking poles is one of the most important factors involved in how well you will be able to hike them. When the height is right, you are better balanced and there is less wall strain on your body. You need to use this guide on How to Properly Size Trekking Poles to tweak your trekking poles properly.
Step-by-step Guide For Adjusting Height
- First, stand up tall, relax your shoulders;
- Then, grab the pole with the tip on the floor;
- Bend down until your elbow creates a 90-degree angle;
- Unlock the pole’s mechanism, This is usually a twist lock or a lever lock;
- Adjust the length of the pole sections;
- Position to desired height and lock the mechanism in place to safeguard the new elevation;
- Repeat on pole to even out on the other pole;
Tips For Proper Adjustment
- Before every hike, verify that the locking system is working;
- Adapt for the terrain shorter for the uphill, longer for the downhill;
- Listen for the “click” in poles with a push-button lock system;
- Be careful, use the measurements marked on the poles for accuracy;
- Check the height before you start your hike;
- Always verify that you have 2 equal length pole;
Using Trekking Poles At The Correct Height
Using trekking poles starts with how to adjust trekking poles. Properly placing your poles adds stability and support. It makes your hiking experience a whole lot different. We will now discuss the advantages and cover some of the pitfalls to avoid.
Benefits Of Using Correctly Adjusted Poles
Proper pole height offers numerous advantages during your hike:
- Saves the knees and legs from exertion;
- Increases balance on uneven ground;
- Helps in trekking for dispersing efforts a evenly across users;
- Improved posture and prevent from lower back pain;
Avoiding Common Mistakes
Poles set at an incorrect height could leave you at best uncomfortable, and at worst injured. Avoid these common mistakes:
| Mistake | Consequence |
| Too Short | Leans you forward, strains your back |
| Too Tall | Raises shoulders, causes discomfort |
Keep in mind that when you are holding the pole and the tip is on the ground your elbow should be at ninety degrees. Make sure you change lengths with each hike.
Maintenance And Care For Trekking Poles
Trekking poles are essential for outdoor sports enthusiasts. There are a few risks though, because filling machines are used so frequently, they are prone to wear and tear which could shorten their life expectancy or degrade its performance. Here are some points that we will discuss to maintain your trekking poles properly.
Cleaning And Storage Tips
Poles should be kept clean for longevity. Follow these simple steps:
- Take poles apart into pieces;
- Clean it off the parts with wet, soapy rags;
- Dry thoroughly to avoid rust;
- Avoid toxic chemicals;
Cool dry place for storage. The poles will also need collapsing and are important to be released all to be allowed out tensions.
Checking Adjustment Mechanisms Regularly
By regularly adjusting with your trekking poles ensure they are functioning, in next steps. Here’s what to do:
- Check condition or wear;
- Verify the system is locked correctly;
- Use and silicone based lubricant as necessary;
- Ensure all screws are tightened;
Conclusion
Once you get the hang of adjusting your trekking poles, it is very easy. Don’t forget, proper seat height yields greater comfort and efficiency on the trail. When you go on your next adventure, try and keep these tips in mind and your knees will thank you.
Related Articles:
FAQs
Trekking poles should be set so when you hold the grips with the tips of the poles on the ground, your elbow is at a 90-degree angle. Shorten for climbing, lengthen for descending. Do not allow arms to pull while stretching arms should move freely without pulling to keep from stressing joints.
Adjust the height on your walking stick so that your elbow is at a comfortable 15 degree bend. Remember to keep your arm relaxed at your side while you stand up to take your measurement.
To change the height of a walking stick, twist the sections of the stick so they unlock, set to correct a length and then twist to lock them back. Make sure the stick goes all the way down to your wrist when you let your arm dangle straight.
Release the locking mechanism of the pole, typically a twist or pull. Move the pole up and down to find the most comfortable length. Now re-fasten the locking mechanism, firmly but securely. Press to check stability Repeat for the other pole.
As an Amazon Associate, I earn from qualifying purchases.
Leave a Reply